Pam Winters Studio

Creative Design and Illustration

  • Projects
    • Graphic Design
      • Business and Promotional
      • Special Event
      • Wedding
    • Illustration
    • Invitations
      • Wedding
      • Bat Mitzvah
      • Bar Mitzvah
    • Workshops
  • Journal
  • About
    • Meet Pam
    • Client Testimonials
    • Creative Process
  • Contact
  • Shop

Custom Party Invitations: Halloween Bunco

By Pam Winters

  • Finished characters for handmade Halloween bunco party custom invitations

    Custom Halloween party invitations I designed, illustrated and assembled by hand. (All images © 2016 by Pam Winters)

  • Handmade custom invitations for a Halloween bunco party

    Custom Halloween party invitations I designed, illustrated and assembled by hand. (All images © 2016 by Pam Winters)

  • Handmade custom invitations for a Halloween bunco party

    Custom Halloween party invitations I designed, illustrated and assembled by hand. (All images © 2016 by Pam Winters)

  • Custom party invitations for a Halloween Bunco

    Custom Halloween party invitations I designed, illustrated and assembled by hand. (All images © 2016 by Pam Winters)

  • Pencil sketches for custom party invitations for a Halloween Bunco

    Custom Halloween party invitations I designed, illustrated and assembled by hand. (All images © 2016 by Pam Winters)

  • Artwork for custom party invitations for a Halloween Bunco

    Custom Halloween party invitations I designed, illustrated and assembled by hand. (All images © 2016 by Pam Winters)

  • Cutting out illustrations to be used in custom party invitations for a Halloween Bunco

    Custom Halloween party invitations I designed, illustrated and assembled by hand. (All images © 2016 by Pam Winters)

Custom Invitations for a Fun Group of Friends

This project is by far one of my all-time favorites: a design for custom party invitations, which included original watercolor illustrations I made special to convey a spooky, but still cute, theme for a Halloween Bunco party (Bunco is a popular social dice game). Every year, Padie (my mom), along with the other women in her Bunco group, each host a Bunco party during one particular month. Padie selected October and asked me early in the year if I would work with her to come up with custom party invitations that would not only portray the spooky fun to be had at her Halloween Bunco party and inspire her friends to attend in costume, but also, give everyone a story to remember as part of the custom party invitations experience.

We started brainstorming ideas, and it was clear right away that furry and feathered woodland creatures would need to be front and center in the design. Armed with the notes from our meetings, I started sketching characters and researching animals I could work into my drawings. After coming up with several rough pencil sketches of various woodland animals in Halloween costumes and the like, I settled on the cast of characters featured here: a squirrel, a rabbit, a deer and an owl. The final pencil drawings complete, I then got to work painting each character in watercolor shades that fit the fall theme. I painted a nighttime background, too, so that our woodland trick-or-treaters would appear on the invitation as part of a finished Halloween scene. After everything was scanned and printed, I printed out another copy of the three main characters, carefully cutting and affixing them by hand to the printed background (using foam squares). This pop-up technique makes these custom party invitations stand WAY out!

Filed Under: Creative Projects Pam Winters Studio, Illustration Projects Pam Winters Studio, Uncategorized Tagged With: characters, custom, design, drawings, halloween, handmade, Illustration, invitation, Invitations, party, project, sketch, Special Event, Special Events, watercolor

Day One: Instagram Illustrations

By Pam Winters

  • 100day_100 1

    Day 100 (I made it!)

  • 100day_99 1

    Day 99

  • 100day_98 1

    Day 98

  • 100day_97

    Day 97

  • 100day_96

    Day 96

  • 100day_95

    Day 95

  • 100day_94

    Day 94

  • 100day_93

    Day 93

  • 100day_92

    Day 92

  • 100day_91

    Day 91

  • 100day_90

    Day 90

  • 100day_89

    Day 89

  • 100day_88

    Day 88

  • 100day_87

    Day 87

  • 100day_86

    Day 86

  • 100day_85

    Day 85

  • Day One: Instagram Illustrations (Day 84)

    Day 84

  • Day One: Instagram Illustrations (Day 83)

    Day 83

  • Day One: Instagram Illustrations (Day 82)

    Day 82

  • Day One: Instagram Illustrations (Day 81)

    Day 81

  • Day One: Instagram Illustrations (Day 80)

    Day 80

  • Day One: Instagram Illustrations (Day 79)

    Day 79

  • Day One: Instagram Illustrations (Day 78)

    Day 78

  • Day One: Instagram Illustrations (Day 77)

    Day 77

  • Day One: Instagram Illustrations (Day 76)

    Day 76

  • Day One: Instagram Illustrations (Day 75)

    Day 75

  • Day One: Instagram Illustrations (Day 74)

    Day 74

  • Day One: Instagram Illustrations (Day 73)

    Day 73

  • Day One: Instagram Illustrations (Day 72)

    Day 72

  • Day One: Instagram Illustrations (Day 71)

    Day 71

  • Day One: Instagram Illustrations (Day 70)

    Day 70

  • Day One: Instagram Illustrations (Day 69)

    Day 69

  • Day One: Instagram Illustrations (Day 68)

    Day 68

  • Day One: Instagram Illustrations (Day 67)

    Day 67

  • Day One: Instagram Illustrations (Day 66)

    Day 66

  • Day One: Instagram Illustrations (Day 65)

    Day 65

  • Day One: Instagram Illustrations (Day 64)

    Day 64

  • Day One: Instagram Illustrations (Day 63)

    Day 63

  • Day One: Instagram Illustrations (Day 62)

    Day 62

  • Day One: Instagram Illustrations (Day 61)

    Day 61

  • Day One: Instagram Illustrations (Day 60)

    Day 60

  • Day One: Instagram Illustrations (Day 59)

    Day 59

  • Day One: Instagram Illustrations (Day 58)

    Day 58

  • Day One: Instagram Illustrations (Day 57)

    Day 57

  • Day One: Instagram Illustrations (Day 56)

    Day 56

  • Day One: Instagram Illustrations (Day 55)

    Day 55

  • Day One: Instagram Illustrations (Day 54)

    Day 54

  • Day One: Instagram Illustrations (Day 53)

    Day 53

  • Day One: Instagram Illustrations (Day 52)

    Day 52

  • Day One: Instagram Illustrations (Day 51)

    Day 51

  • Day One: Instagram Illustrations (Day 50)

    Day 50

  • Instagram 100 Day Project Illustration: Day 49

    Day 49

  • Instagram 100 Day Project Illustration: Day 48

    Day 48

  • Instagram 100 Day Project Illustration: Day 47

    Day 47

  • Instagram 100 Day Project Illustration: Day 46

    Day 46

  • Instagram 100 Day Project Illustration: Day 45

    Day 45

  • Instagram 100 Day Project Illustration: Day 44

    Day 44

  • Instagram 100 Day Project Illustration: Day 43

    Day 43

  • Instagram 100 Day Project Illustration: Day 42

    Day 42

  • Instagram 100 Day Project Illustration: Day 41

    Day 41

  • Instagram 100 Day Project Illustration: Day 40

    Day 40

  • Instagram 100 Day Project Illustration: Day 39

    Day 39

  • Instagram 100 Day Project Illustration: Day 38

    Day 38

  • Instagram 100 Day Project Illustration: Day 37

    Day 37

  • Instagram 100 Day Project Illustration: Day 36

    Day 36

  • Instagram 100 Day Project Illustration: Day 35

    Day 35

  • Instagram 100 Day Project Illustration: Day 34

    Day 34

  • Instagram 100 Day Project Illustration: Day 33

    Day 33

  • Instagram 100 Day Project Illustration: Day 32

    Day 32

  • Instagram 100 Day Project Illustration: Day 31

    Day 31

  • Instagram 100 Day Project Illustration: Day 30

    Day 30

  • Instagram 100 Day Project Illustration: Day 29

    Day 29

  • Instagram 100 Day Project Illustration: Day 28

    Day 28

  • Instagram 100 Day Project Illustration: Day 27

    Day 27

  • Instagram 100 Day Project Illustration: Day 26

    Day 26

  • Instagram 100 Day Project Illustration: Day 25

    Day 25

  • Instagram 100 Day Project Illustration: Day 24

    Day 24

  • Instagram 100 Day Project Illustration: Day 23

    Day 23

  • Instagram 100 Day Project Illustration: Day 22

    Day 22

  • Instagram 100 Day Project Illustration: Day 21

    Day 21

  • Instagram 100 Day Project Illustration: Day 20

    Day 20

  • Instagram 100 Day Project Illustration: Day 19

    Day 19

  • Instagram 100 Day Project Illustration: Day 18

    Day 18

  • Instagram 100 Day Project Illustration: Day 17

    Day 17

  • Instagram 100 Day Project Illustration: Day 16

    Day 16

  • Instagram 100 Day Project Illustration: Day 15

    Day 15

  • Instagram 100 Day Project Illustration: Day 14

    Day 14

  • Instagram 100 Day Project Illustration: Day 13

    Day 13

  • Instagram 100 Day Project Illustration: Day 12

    Day 12

  • Instagram 100 Day Project Illustration: Day 11

    Day 11

  • Instagram 100 Day Project Illustration: Day 10

    Day 10

  • Instagram 100 Day Project Illustration: Day 9

    Day 9

  • Instagram 100 Day Project Illustration: Day 8

    Day 8

  • Instagram 100 Day Project Illustration: Day 7

    Day 7

  • Instagram 100 Day Project Illustration: Day 6

    Day 6

  • Instagram 100 Day Project Illustration: Day 5

    Day 5

  • Instagram 100 Day Project Illustration: Day 4

    Day 4

  • Instagram 100 Day Project Illustration: Day 3

    Day 3

  • Instagram 100 Day Project Illustration: Day 2

    Day 2

  • Instagram 100 Day Project Illustration: Day 1

    Day 1

  • Instagram 100 Day Project Illustration: The Pledge!

    The pledge!

Recently, I started participating in the 100 Day Project on Instagram, a creative challenge originally begun by artist and author Elle Luna and the print publication and online magazine The Great Discontent. It was easy for me to choose my theme and accompanying (unique) hashtag, which is #100DaysofEarlyChristmas. My main creative business goal this year is to create a line of holiday products based on my designs and drawings. Doing these daily drawings and posts for the challenge will keep me on track to have a sizable collection of ideas ready to develop into finished holiday-themed illustrations that will then be turned into cards, gift wrap and whatever else I can dream up. Having made it just over a third of the way through my journey in the challenge, this is the perfect time to gather up my ideas so far and post them here. This is a figurative high five to myself and everyone else participating, for not only taking on the challenge, but also for sticking with it.

One key part of the 100 Day Project is the fact that one publicly commits on Instagram to doing it, no matter when you actually join the challenge. It’s a daily exercise in which you have pledged to participate, and once you do that, you are now voluntarily connected to a group of people who have made the same pledge. You instantly feel the connection with everyone by way of common hashtags such as #The100DayProject. Each participant also has the option to choose their own, unique hashtag to coincide with their chosen theme, so that there is an instant showcase of their work on Instagram (when you click on their hashtag). Participants can create and post whatever strikes their fancy, each project being a distinct personal journey of some sort or other. I’ve seen posts by people working on improving a particular skill, getting back to doing an activity they love, sharing inspiration and daily rituals, and so on. The possibilities with this challenge are literally endless. For me, I’ve noticed that it’s gotten easier to just posting something, even if I’m not crazy about the piece, for the sake of keeping up with the challenge and my commitment to the daily practice of getting my ideas down on paper. The 100 Day Project brings into sharp focus how important it is to simply begin. Day One already seems like a long time ago, but if I had never started the journey, Day One wouldn’t even exist.

Slideshow photos are from my Instagram feed: instagram.com/pamwinters (All images © 2016 by Pam Winters)

Related links:
#100DaysofEarlyChristmas (My project)
#The100DayProject (All projects)
#100DaysOfFutureMemoriesByElleLuna (Elle Luna’s project)
The 100 Day Project (History + details)

Enjoy this article? Sign up for creative news and goodies delivered to your inbox:

Newsletter

Filed Under: Creative Journal Pam Winters Studio, Illustration Projects Pam Winters Studio, Uncategorized Tagged With: blog, cartooning, cartoonist, christmas, Illustration, illustrations, illustrator, instagram, journal, the100dayproject

Love and Books

By Pam Winters

Love and Books watercolor illustration

Watercolor illustration © 2016 by Pam Winters

Two things I loved about grade school: Valentine’s Day and books. Even now, when someone mentions Valentine’s Day, my mind immediately goes to childhood days gone by, where I traded paper valentines with classmates, each of us filling one another’s decorated Valentine’s Day boxes with an assortment of handwritten cards. In much the same way, I looked forward to the monthly book orders and annual book fairs at my school. When the order forms for new Scholastic Reading Club books came in, I pored over the selection and carefully chose the titles that sounded the most interesting to me. It was always exciting when the books arrived and we got to take them home. Receiving and giving valentines and books were favorite parts of my childhood, and the memories attached to these things remain very special to me today.

And so, Valentine’s Day is here again already. As I recently discovered, February 14 also marks International Book Giving Day. Pairing these holidays makes a great deal of sense. Valentine’s Day traditionally being a day for showing others we care, our collective mindset is primed for opening our hearts, spreading joy and giving gifts. This is where Book Giving Day finds a warm welcome, with its mission to “get books into the hands of as many children as possible.” This means both new and gently used books are fair game—anything that will benefit a child.

There are a number of ways to get involved on Book Giving Day, many of which you can find at bookgivingday.com. Inspired by their list, here are several good ideas:

  • Donate books to a library, where they can be shelved or sold to raise funds for other books.
  • Donate books to a medical office or other such place with a waiting room (e.g., a car dealership, hair salon or spa).
  • Give books to/trade books with the children of family and friends (e.g., books that your children have outgrown).
  • Attach a book plate to any book you donate/give/trade that asks the recipient to read the book and then pass it along to another reader.
  • Spread the word about Book Giving Day on social media, using #bookgivingday.
  • Start planning your own 2016 book-raiser! Check out Milk+Bookies, a non-profit organization that helps plan events for collecting books in the U.S. and Canada, for more information on hosting one of these.

As we enter this day of cards, candy and flowers, consider also the simple gesture of passing along a book. Much like that paper valentine received from a classmate, one book has the potential power to make a young person feel special and valued. And if this were to help instill a love and appreciation for reading that lasts a lifetime, I would say that Valentine’s Day just got a whole lot sweeter!

Related links:
Scholastic Reading Club website
International Book Giving Day website
Milk+Bookies website

Filed Under: Creative Journal Pam Winters Studio, Illustration Projects Pam Winters Studio, Uncategorized Tagged With: Book Giving Day, books, child, children, donate, donation, drawing, Illustration, journal, reading, school, Valentine's Day, valentines, watercolor

Pineapple Expression

By Pam Winters

  • Pineapple stamp project

    Inspired by the tools at hand, I let the project unfold. (All images © 2016 by Pam Winters)

  • Pineapple stamp project

    The journey began with a pencil sketch and quickly evolved from there. (All images © 2016 by Pam Winters)

  • Pineapple stamp project

    In order to “color in” the pineapple, I created shapes in Illustrator (left) and cut them on a CAMEO using special stamp material (right). (All images © 2016 by Pam Winters)

  • Pineapple stamp project

    The stamp pieces made by the CAMEO are mounted onto acrylic blocks, then inked. (All images © 2016 by Pam Winters)

  • Pineapple stamp project

    Once the colors are stamped, the pineapple image is inked and stamped on top. (All images © 2016 by Pam Winters)

  • Pineapple stamp project

    I started creating lots of gift wrap, cards and prints! (All images © 2016 by Pam Winters)

  • Pineapple stamp project

    I then decided to turn the image into digital art using Illustrator. (All images © 2016 by Pam Winters)

  • Pineapple stamp project

    Once the digital art was complete, I created a pattern and ordered custom gift wrap from Spoonflower! (All images © 2016 by Pam Winters)

  • Pineapple stamp project

    This project required a few tools and lots of patience! (All images © 2016 by Pam Winters)

Pineapples have been dancing through our minds and hearts in recent years. Based on this trend, I had pineapples on the brain when I met with some coworkers for a craft night. Before long, while chatting with my friends, I found myself sketching a pineapple, and then began hand carving a stamp using the supplies I had with me. As we wrapped up for the evening, sharing our projects with one another, I tested out the pineapple stamp on a piece of scrap paper. Not bad, I thought. Someone suggested the possibility of making pineapple gift wrap with the stamp, so I decided then and there that was exactly what I would do! I mean, even at the height of the pineapple’s popularity, it’s not every day you see pineapple gift wrap, right?

I came home that night, and stamped it again using darker ink. I could see my pineapple vision taking shape. Within the next day or two, I got the image carved the way I wanted, and that’s when the process of surface pattern experimentation really began for me. The pineapple looked good stamped on its own, but it needed something—a bit of color to fill it in. I started with colored pencils, making a few cards for friends that way, before gradually expanding my reach to other tools, including the Silhouette CAMEO and special stamp material for the CAMEO to cut. I now had shapes I could stamp first for the color portions of the pineapple, with the pineapple stamp being layered in a darker (chocolate) color on top. This was happening!

There is something unmistakably special about handmade gift wrap, but it’s also quite a challenge. Encouraged to keep going, I decided it was time to take my art to the professionals for the production side of things. So, I digitally traced a scan of the stamped pineapple image in Adobe Illustrator, for the purpose of creating a pattern to upload to Spoonflower’s website. Soon, my first roll of custom gift wrap made with the pineapple pattern arrived in the mail, and it was literally just what I had imagined!

It’s fun to look back and see how this project unfolded, one bit of inspiration at a time. How many things inspire us every day that we could potentially turn into something we only dream of right now? Please take a moment to let me know what’s inspiring YOU these days in the comments section!

Filed Under: Creative Journal Pam Winters Studio, Illustration Projects Pam Winters Studio, Uncategorized Tagged With: blog, design, drawing, Graphic Design, hand carved, handmade, Illustration, journal, pattern, pineapple, Portfolio, project, stamp, surface design

Summertime Favorite: Blueberry Buckle

By Pam Winters

  • Summertime Favorite: Blueberry Buckle recipe photo

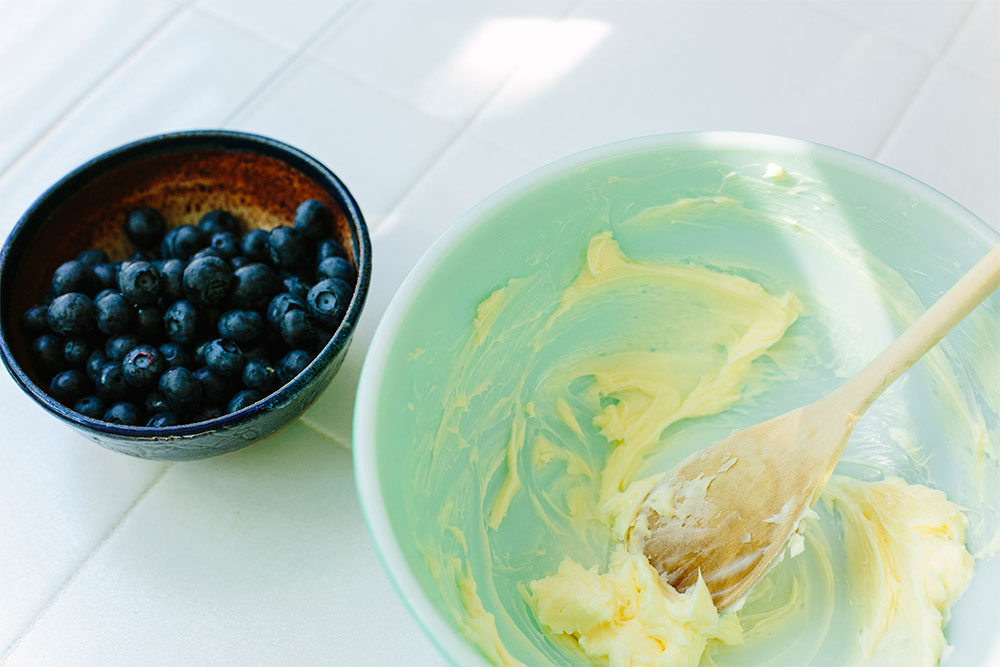
    Butter and sugar, mixed until light and fluffy, are the beginnings of Blueberry Buckle (Photos by Stacey Winters Photography, © 2015 by Pam Winters)

  • Summertime Favorite: Blueberry Buckle recipe photo

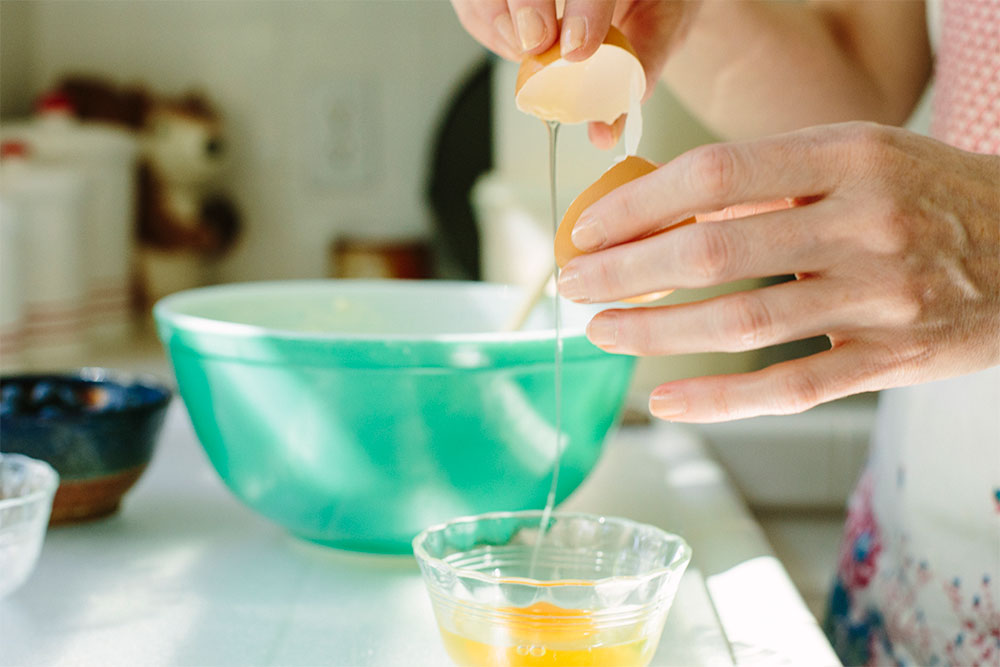
    Adding an egg to the butter mixture, which will become the batter (Photos by Stacey Winters Photography, © 2015 by Pam Winters)

  • Summertime Favorite: Blueberry Buckle recipe photo

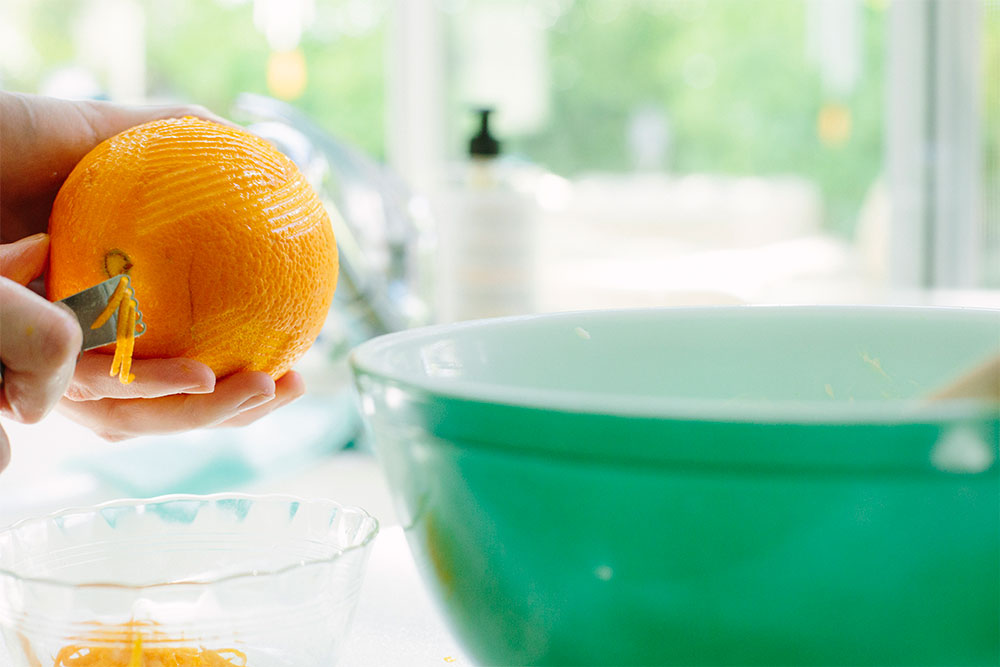
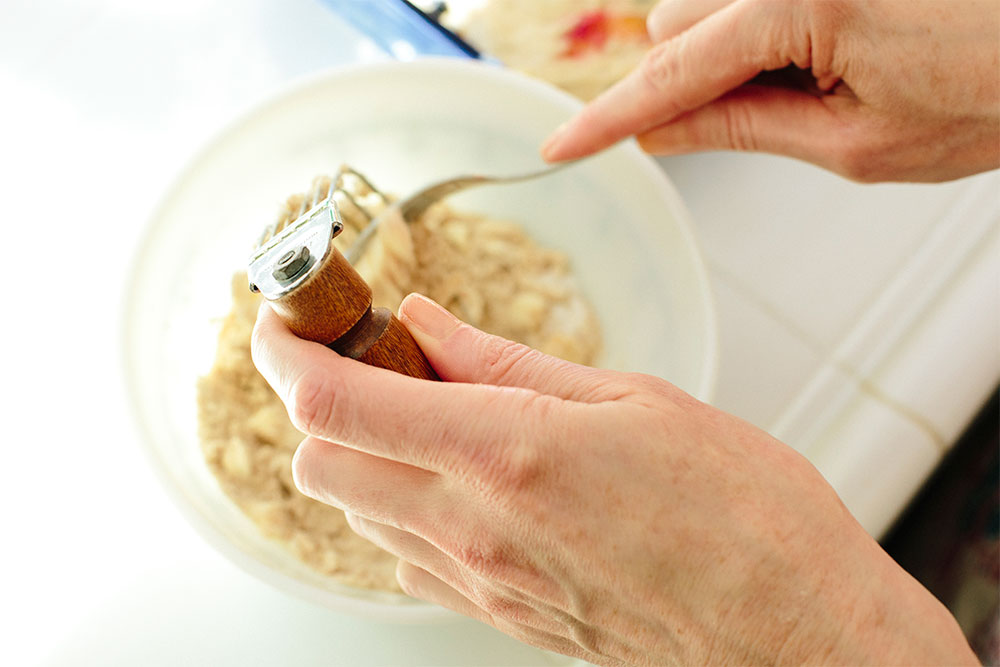
    Peeling fresh orange zest with a special tool is the best way to infuse a little citrus flavor into the recipe (Photos by Stacey Winters Photography, © 2015 by Pam Winters)

  • Summertime Favorite: Blueberry Buckle recipe photo

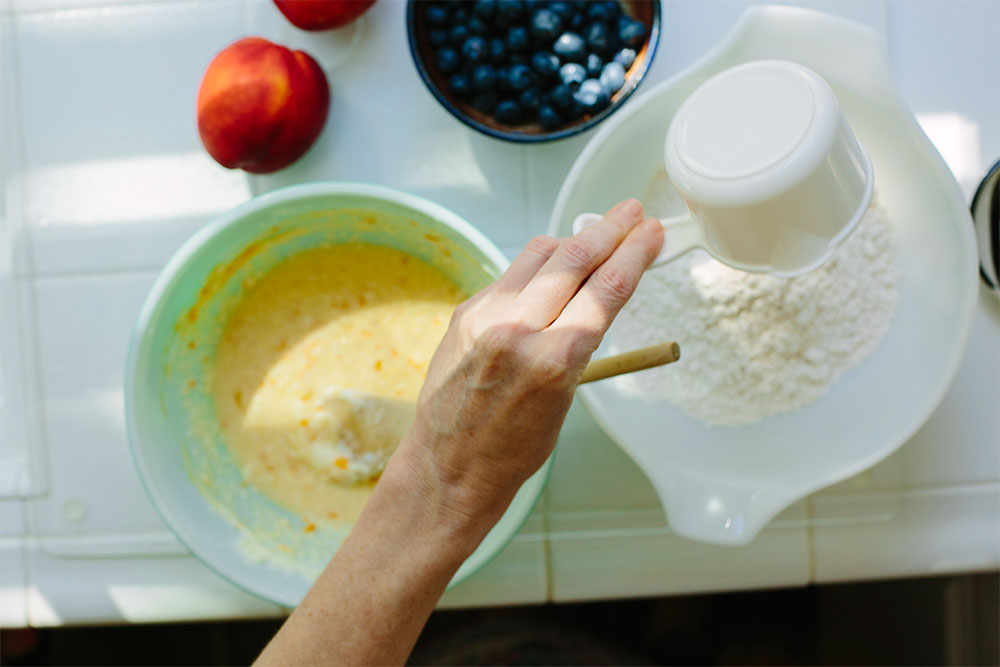
    Mixing the dry ingredients in a separate bowl, before adding them to the wet batter ingredients (Photos by Stacey Winters Photography, © 2015 by Pam Winters)

  • Summertime Favorite: Blueberry Buckle recipe photo

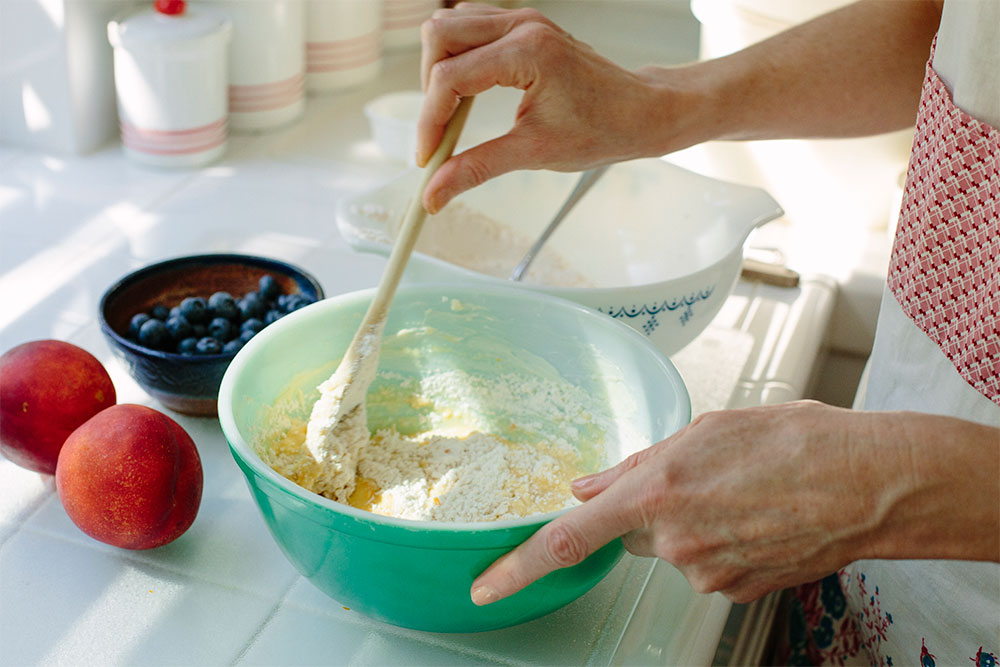
    Wet and dry ingredients are gently blended together (Photos by Stacey Winters Photography, © 2015 by Pam Winters)

  • Summertime Favorite: Blueberry Buckle recipe photo

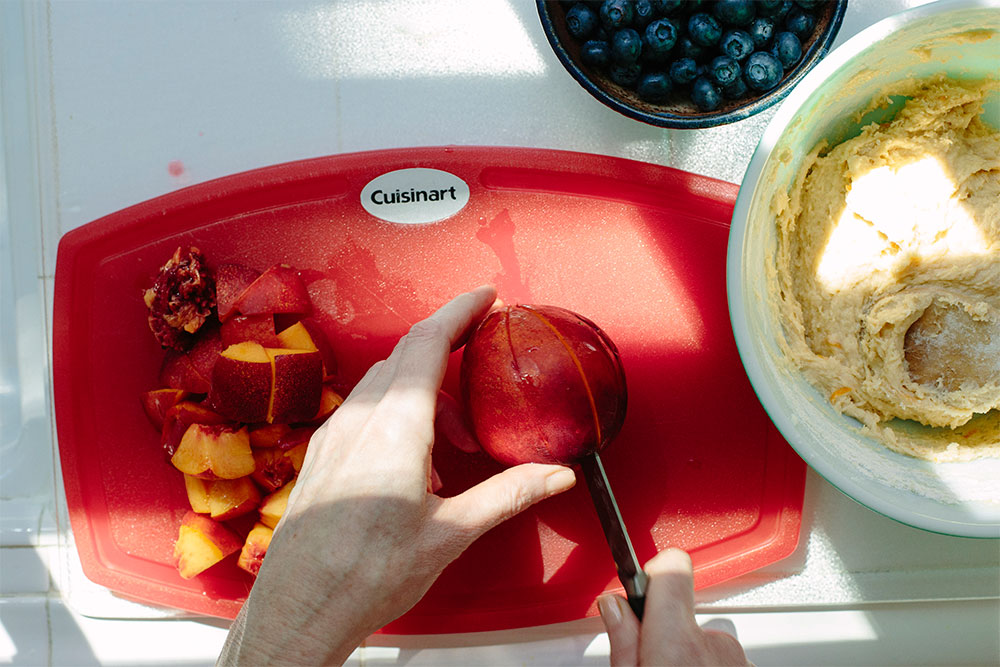
    Cutting fresh nectarines into slices, then into thirds (Photos by Stacey Winters Photography, © 2015 by Pam Winters)

  • Summertime Favorite: Blueberry Buckle recipe photo

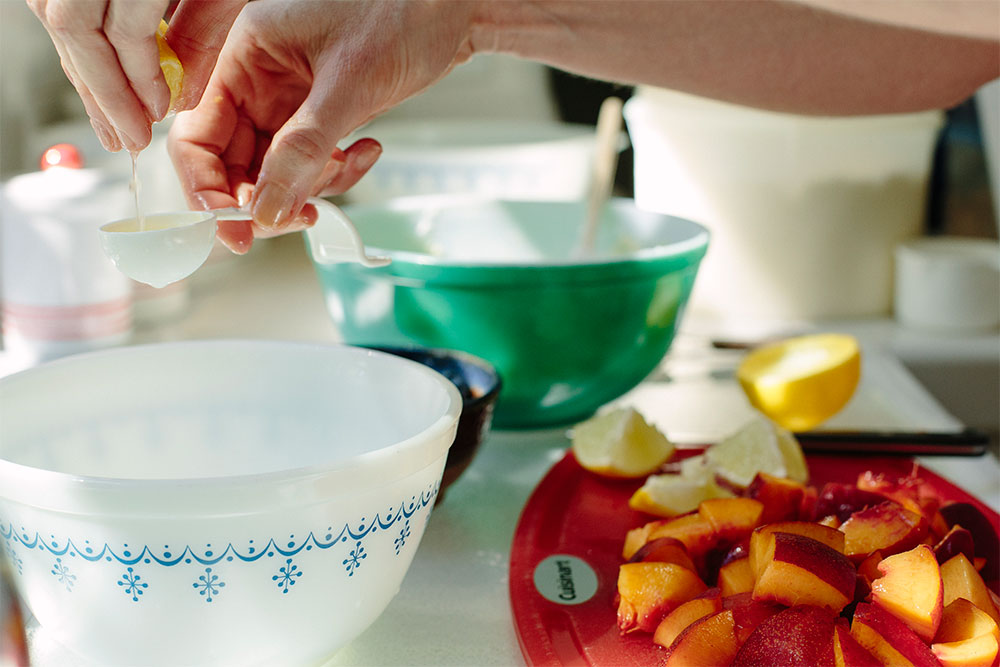
    Getting ready to mix the nectarine slices with freshly-squeezed lemon juice (Photos by Stacey Winters Photography, © 2015 by Pam Winters)

  • Summertime Favorite: Blueberry Buckle recipe photo

    Mixing fresh fruit together, including the citrus flavoring from the lemon juice (Photos by Stacey Winters Photography, © 2015 by Pam Winters)

  • Summertime Favorite: Blueberry Buckle recipe photo

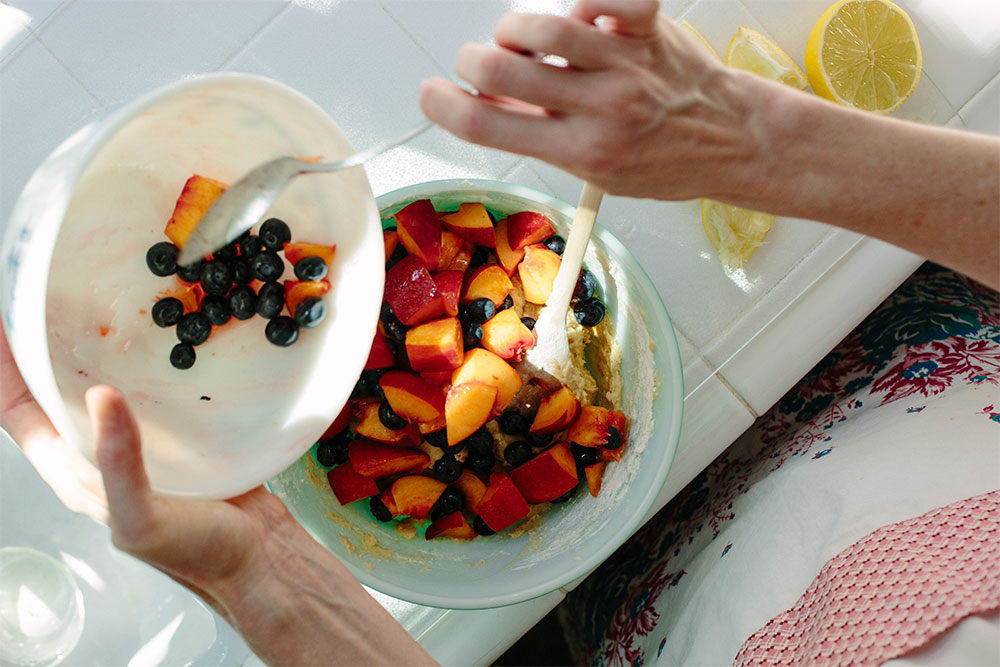
    Combined blueberries and nectarines are gently mixed into the batter bowl (Photos by Stacey Winters Photography, © 2015 by Pam Winters)

  • Summertime Favorite: Blueberry Buckle recipe photo

    A handheld pastry blender mixes the topping ingredients: flour, butter, cinnamon and sugars (Photos by Stacey Winters Photography, © 2015 by Pam Winters)

  • Summertime Favorite: Blueberry Buckle recipe photo

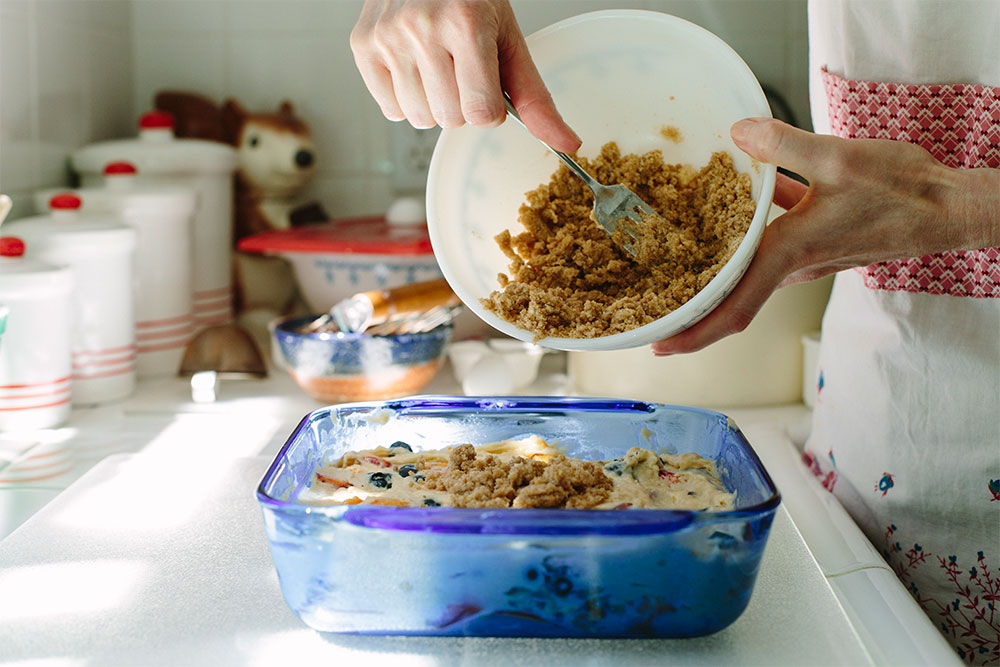
    Blended topping ingredients are sprinkled to cover the batter, which fills a square baking pan (Photos by Stacey Winters Photography, © 2015 by Pam Winters)

  • Summertime Favorite: Blueberry Buckle recipe photo

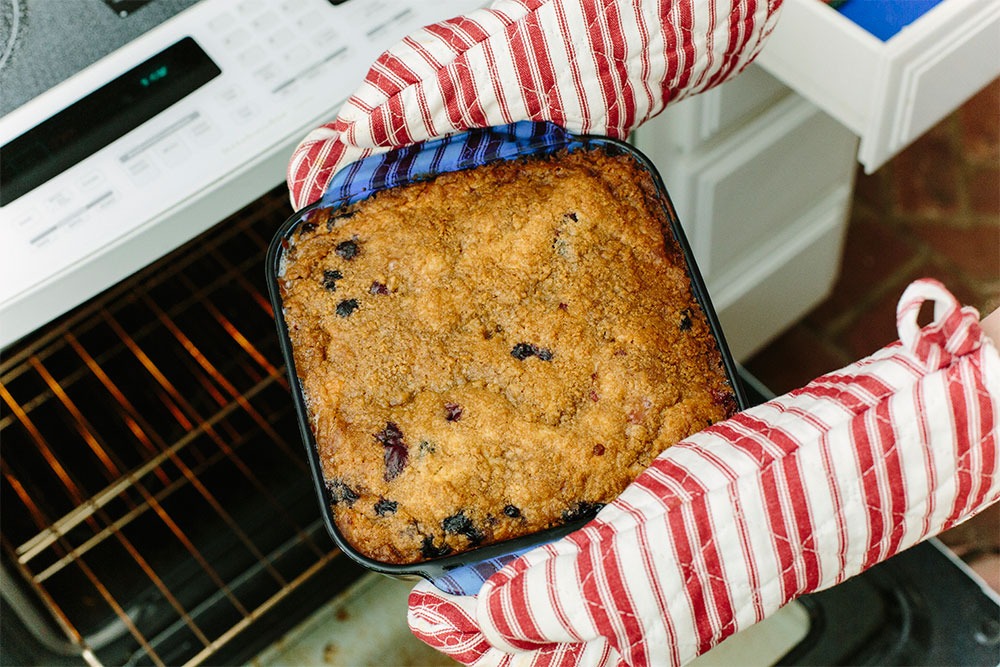
    The cooked dessert is removed from the oven and tested with a toothpick in the center (Photos by Stacey Winters Photography, © 2015 by Pam Winters)

  • Summertime Favorite: Blueberry Buckle recipe photo

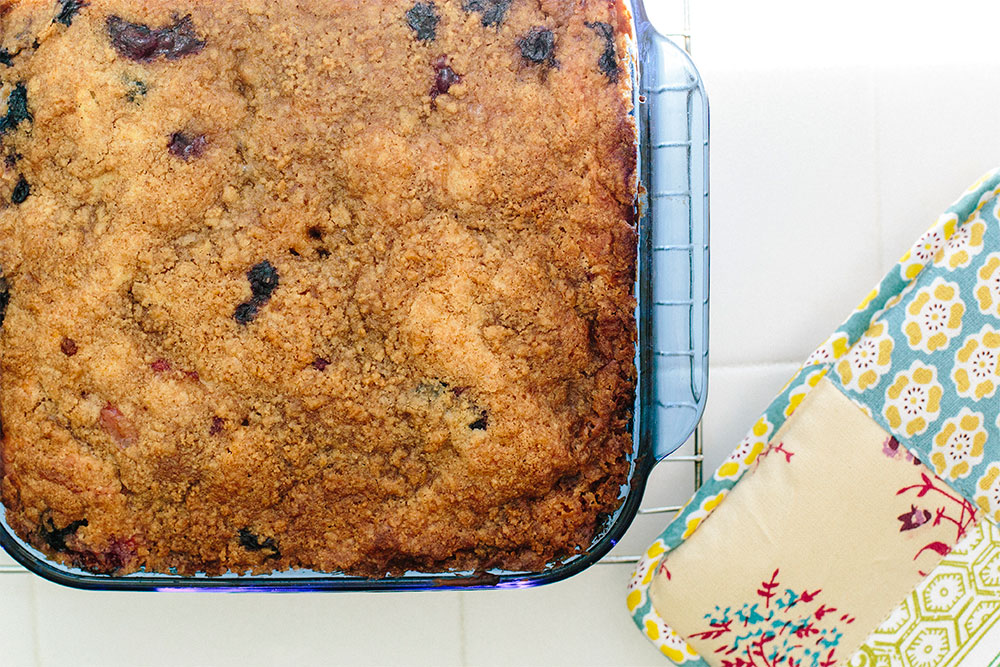
    Just out of the oven, the dessert is set aside to cool for 15 minutes on a baking rack (Photos by Stacey Winters Photography, © 2015 by Pam Winters)

  • Summertime Favorite: Blueberry Buckle recipe photo

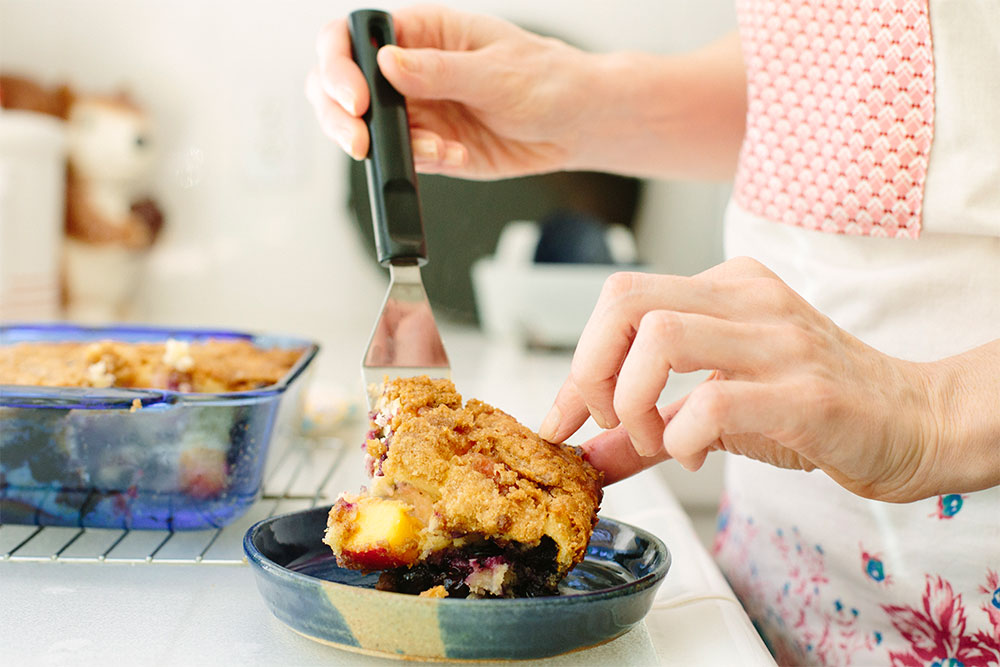
    Cutting the first piece (Photos by Stacey Winters Photography, © 2015 by Pam Winters)

  • Summertime Favorite: Blueberry Buckle recipe photo

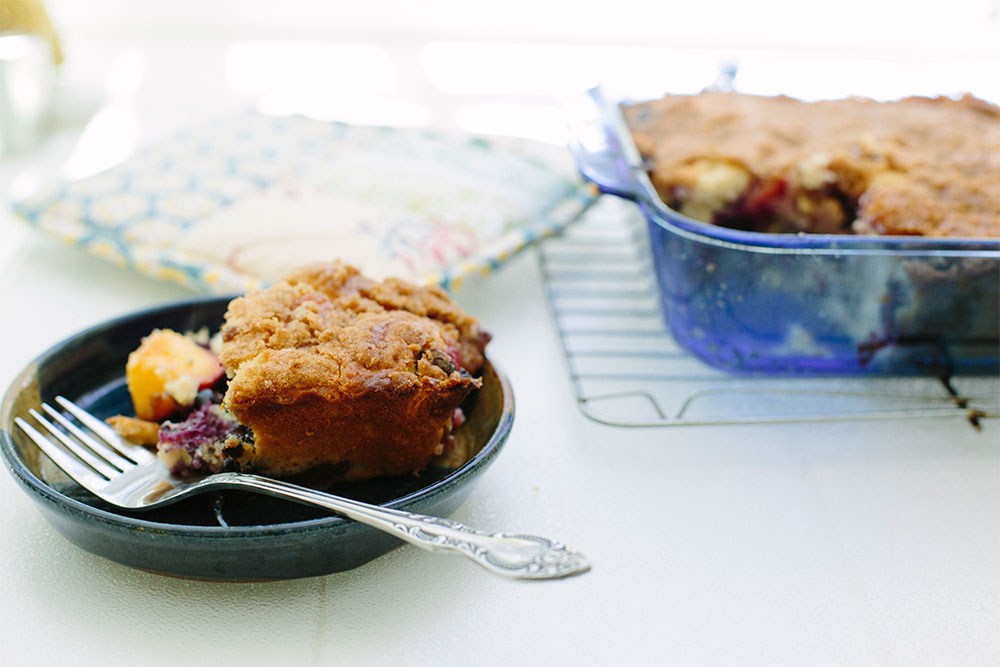
    Bon appétit! (Photos by Stacey Winters Photography, © 2015 by Pam Winters)

Blueberry + Nectarine Heart Digital Illustration

During the summer of 1986, I found myself standing in a grocery store line with my mom. I remember perusing the magazines at the checkout stand, a habit I continue to have to this day. I’m sure I scanned the usual fare: TV Guide, Cosmopolitan, etc. Suddenly, a new item caught my undivided attention: Good Food Magazine. The cover displayed the headline “Star-Spangled Desserts,” placed just above a close-up shot of fresh berries mingled together in a perfect balance of red and blackish blue. I remember picking up the small booklet-sized magazine, intent on finding out what was meant by “Star-Spangled Desserts.” Whatever it was, it sounded right up my alley. The Good Food issue in my hands, I quickly turned the pages of the article in question, whereby I found not one, but an entire collection of colorful desserts. Even as a teenager, I was quite a baker, and I knew something good when I saw it. The thought came to my mind: did I hit the jackpot or what?

Well, as it turns out, there was one recipe in particular that would emerge as my true love from that article swimming with delicious summertime desserts. That recipe is Blueberry Buckle. Just the name itself was enough to close the deal. Who eats “buckle”? Sounds like fun! Looking at the article today, which contains a photo of all the desserts (yes, I saved the original cover and article pages from the magazine), I can see why I picked Blueberry Buckle as the one to make. First of all: blueberries and nectarines; need I say more? In the photo, Blueberry Buckle is cut into square pieces, which are stacked on one another, looking moist and dense—like the best kind of coffee cake—and showcasing clusters of baked fruit; each piece is adorned with a blanket of golden crumble topping. One of the best things about this recipe, besides its good looks and taste, is its versatility. Blueberry Buckle can be served warm or cold, and is equally delicious. It can be eaten for breakfast or for afternoon/evening dessert, along with coffee or tea; in the latter instance, a scoop of vanilla bean ice cream when the dessert is fresh out of the oven truly completes it.

Baking remains one of my all-time favorite culinary activities to this day. And thanks to Blueberry Buckle, I am never lacking for a summertime recipe to make for family and friends. Sadly, for the other recipes in that Good Food article, I have never had the heart–or perhaps more accurately, the willpower–to tear myself away from making Blueberry Buckle long enough to give them a try. That’s how good this recipe is, and why I continue to make it for all the special and wonderful people in my life. I love nothing more than seeing their eyes light up in anticipation of the infamous “buckle.” These moments, filled with joy, laughter and conversation, shared over a homemade treat, are a true gift. And I realize that, yet again, I’ve hit the jackpot.

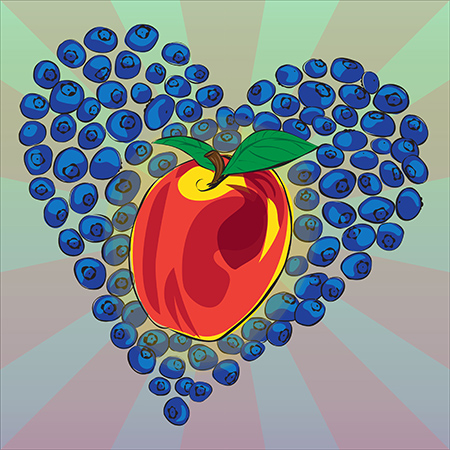
Pictured above: Original digital illustration, © 2015 by Pam Winters

Click here to view the complete Blueberry Buckle recipe, as it originally appeared in Good Food Magazine. Bon appétit!

Filed Under: Creative Journal Pam Winters Studio, Uncategorized Tagged With: art, baking, blog, blueberry, blueberry buckle, cooking, creative, dessert, favorite, homemade, Illustration, journal, projects, recipe, summertime, writing

  • 1
  • 2
  • Next Page »

Get in touch

Phone: 760-761-4933
Email: pam@pamwinters.com

Office Hours (Week of 2/18):

M-F: 1-5 p.m. (PT)

Stay in the loop

Let’s connect

Back to top
Copyright © 2019 by Pam Winters