Pam Winters Studio

Creative Design and Illustration

  • Projects
    • Graphic Design
      • Business and Promotional
      • Special Event
      • Wedding
    • Illustration
    • Invitations
      • Wedding
      • Bat Mitzvah
      • Bar Mitzvah
    • Workshops
  • Journal
  • About
    • Meet Pam
    • Client Testimonials
    • Creative Process
  • Contact
  • Shop

Custom Party Invitations: Halloween Bunco

By Pam Winters

Custom Party Invitations: Halloween Bunco

Custom Halloween party invitations I designed, illustrated and assembled by hand. (All images © 2016 by Pam Winters)

Custom Party Invitations: Halloween Bunco

Custom Halloween party invitations I designed, illustrated and assembled by hand. (All images © 2016 by Pam Winters)

Custom Party Invitations: Halloween Bunco

Custom Halloween party invitations I designed, illustrated and assembled by hand. (All images © 2016 by Pam Winters)

Custom Party Invitations: Halloween Bunco

Custom Halloween party invitations I designed, illustrated and assembled by hand. (All images © 2016 by Pam Winters)

Custom Party Invitations: Halloween Bunco

Custom Halloween party invitations I designed, illustrated and assembled by hand. (All images © 2016 by Pam Winters)

Custom Party Invitations: Halloween Bunco

Custom Halloween party invitations I designed, illustrated and assembled by hand. (All images © 2016 by Pam Winters)

Custom Party Invitations: Halloween Bunco

Custom Halloween party invitations I designed, illustrated and assembled by hand. (All images © 2016 by Pam Winters)

Custom Invitations for a Fun Group of Friends

This project is by far one of my all-time favorites: a design for custom party invitations, which included original watercolor illustrations I made special to convey a spooky, but still cute, theme for a Halloween Bunco party (Bunco is a popular social dice game). Every year, Padie (my mom), along with the other women in her Bunco group, each host a Bunco party during one particular month. Padie selected October and asked me early in the year if I would work with her to come up with custom party invitations that would not only portray the spooky fun to be had at her Halloween Bunco party and inspire her friends to attend in costume, but also, give everyone a story to remember as part of the custom party invitations experience.

We started brainstorming ideas, and it was clear right away that furry and feathered woodland creatures would need to be front and center in the design. Armed with the notes from our meetings, I started sketching characters and researching animals I could work into my drawings. After coming up with several rough pencil sketches of various woodland animals in Halloween costumes and the like, I settled on the cast of characters featured here: a squirrel, a rabbit, a deer and an owl. The final pencil drawings complete, I then got to work painting each character in watercolor shades that fit the fall theme. I painted a nighttime background, too, so that our woodland trick-or-treaters would appear on the invitation as part of a finished Halloween scene. After everything was scanned and printed, I printed out another copy of the three main characters, carefully cutting and affixing them by hand to the printed background (using foam squares). This pop-up technique makes these custom party invitations stand WAY out!

Filed Under: Creative Projects Pam Winters Studio, Illustration Projects Pam Winters Studio, Uncategorized Tagged With: characters, custom, design, drawings, halloween, handmade, Illustration, invitation, Invitations, party, project, sketch, Special Event, Special Events, watercolor

Custom Invitation and Garland: Peach Birthday Party

By Pam Winters

Custom Invitation and Garland: Peach Birthday Party

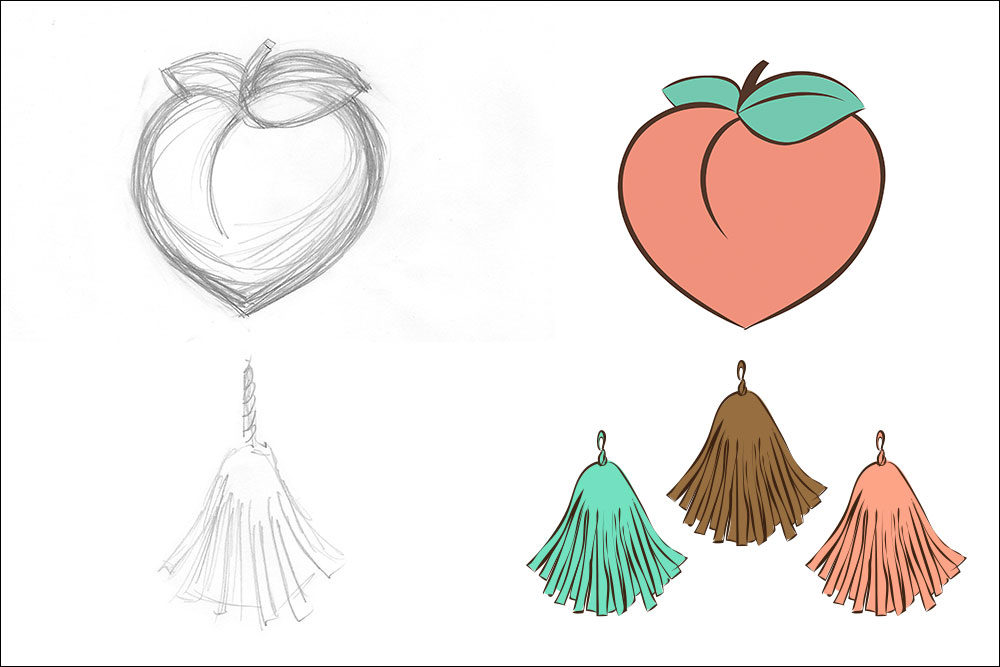
Pencil sketches and digital illustrations of a peach and tassels for the custom birthday party invitation. (All images © 2016 by Pam Winters)

Custom Invitation and Garland: Peach Birthday Party

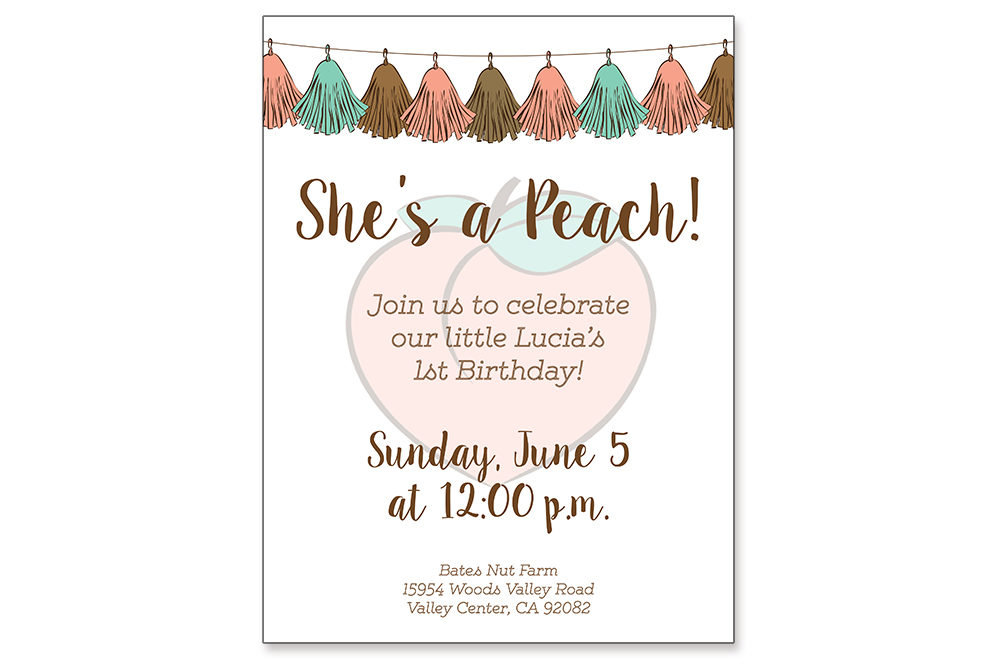
A digital custom birthday party invitation featuring original illustrations. (All images © 2016 by Pam Winters)

Custom Invitation and Garland: Peach Birthday Party

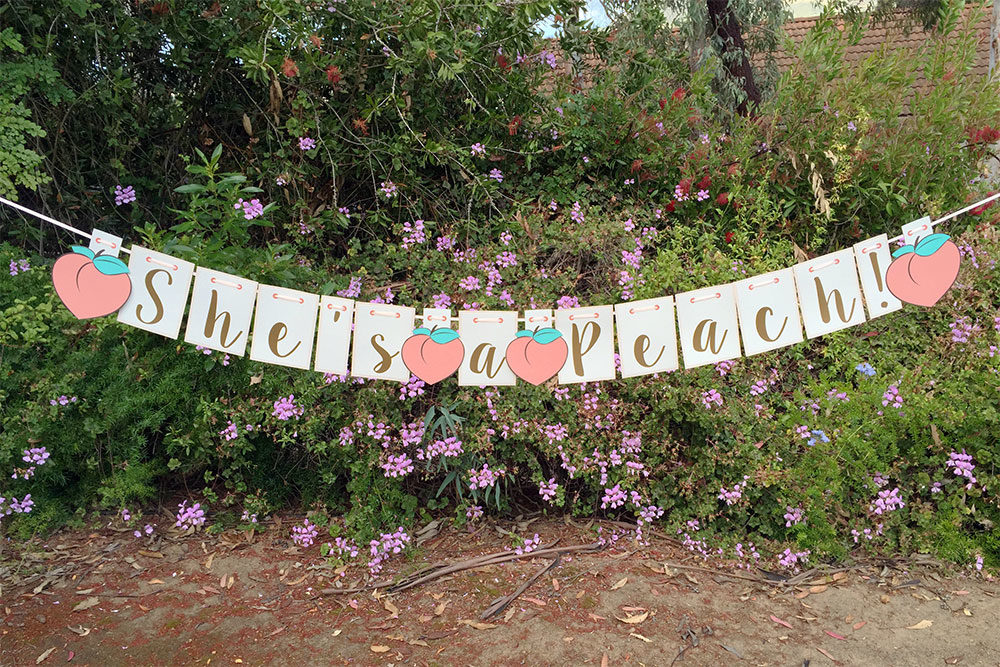
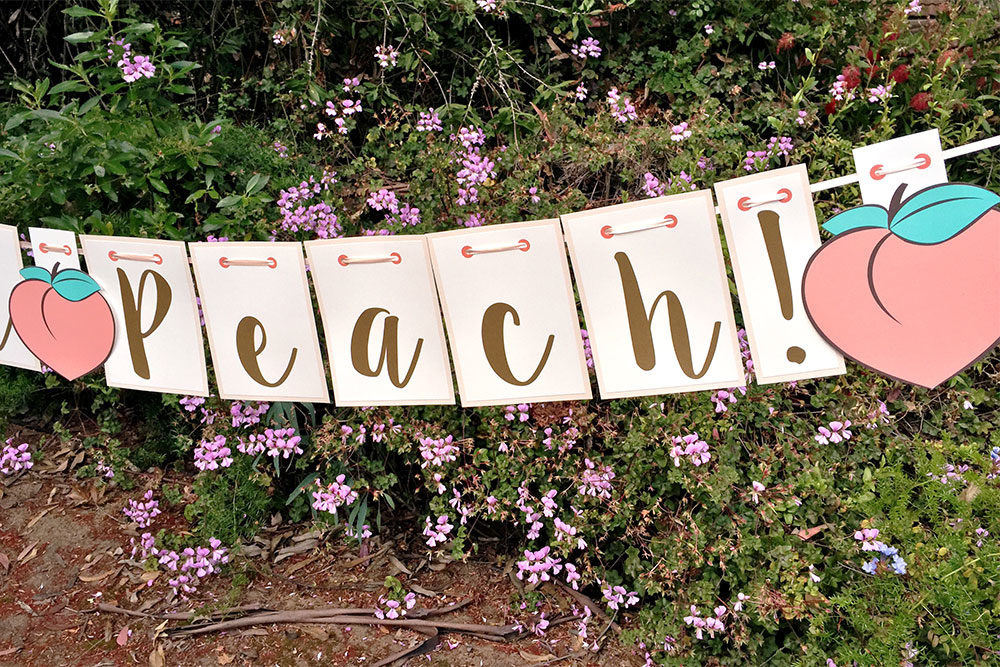
The finished custom birthday garland spelled out “She’s a Peach!” (All images © 2016 by Pam Winters)

Custom Invitation and Garland: Peach Birthday Party

Each letter was cut out and assembled by hand before being strung on satin ribbon to spell out “She’s a Peach!” (All images © 2016 by Pam Winters)

Custom Invitation and Garland: Peach Birthday Party

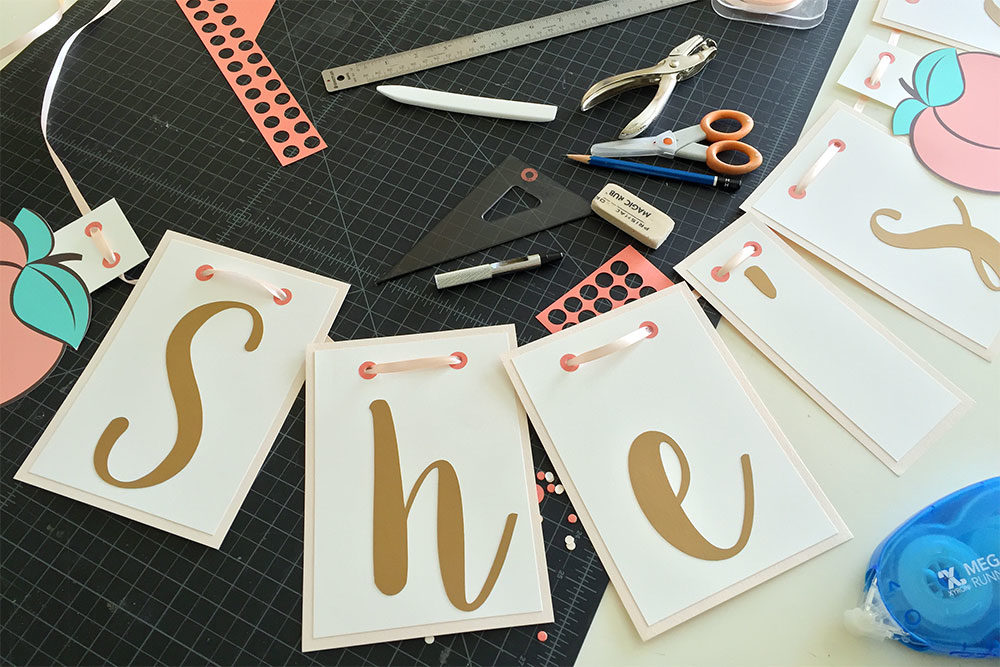
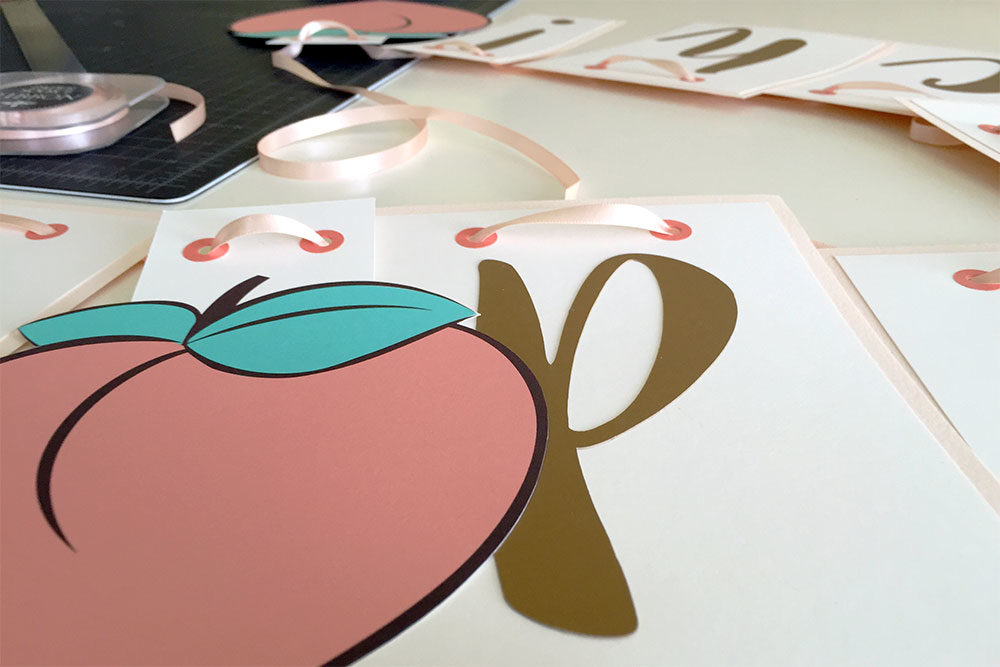
Paper letters and peach art strung on satin ribbon for the custom garland. (All images © 2016 by Pam Winters)

Custom Invitation and Garland: Peach Birthday Party

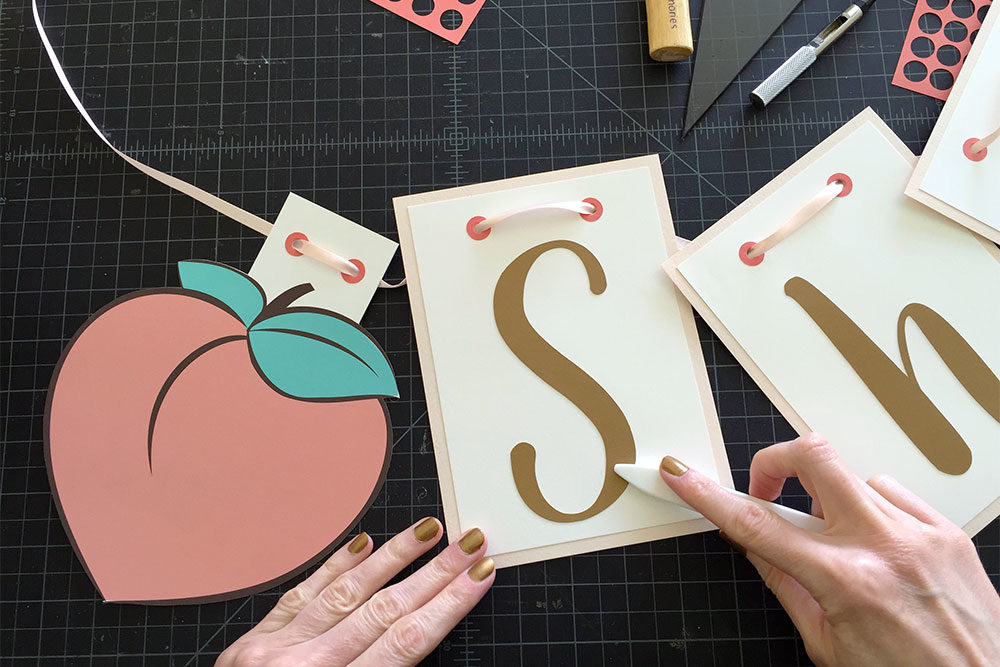
Close-up of paper letter and peach art strung on satin ribbon for the custom garland. (All images © 2016 by Pam Winters)

Custom Invitation and Garland: Peach Birthday Party

Paper letters and peach art hang on a satin ribbon for the custom birthday garland. (All images © 2016 by Pam Winters)

Custom Invitation and Garland: Peach Birthday Party

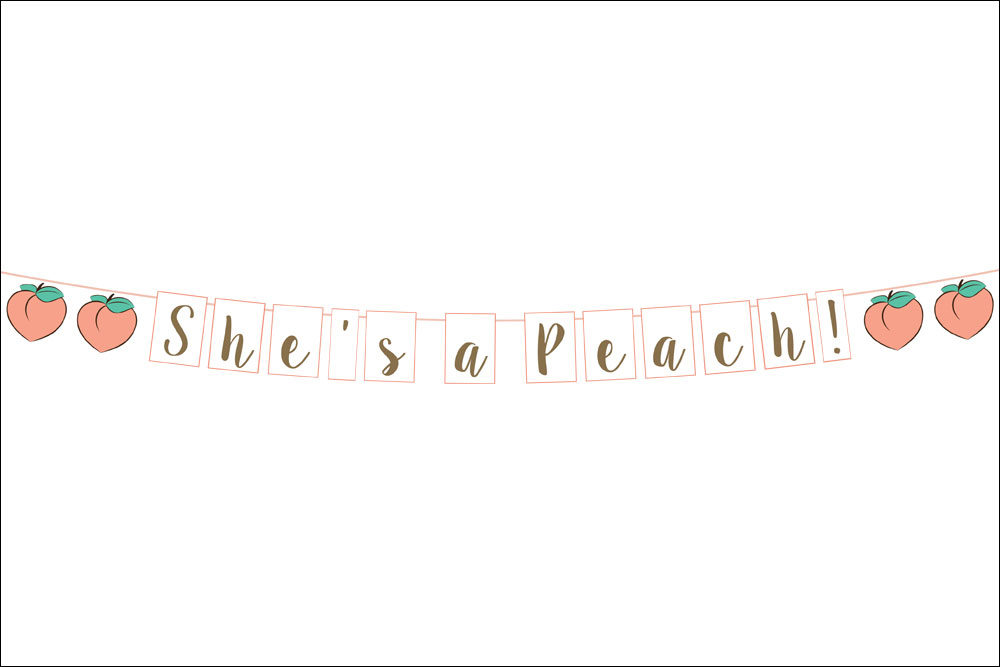
A digital mock-up I created before assembling the handmade custom garland. (All images © 2016 by Pam Winters)

Custom Invitation and Garland for a Sweet Birthday Girl

Projects where I get to draw original illustrations are some of my very favorite, and this one for a custom invitation and garland is no exception! One of my previous clients, the mother of a sweet little girl nearing her first birthday, contacted me for custom invitation and garland designs centered on a peach theme. Being a fan of tassels and peach hues, Angie brought me her inspiration and ideas for Lucia’s birthday party and we met to discuss them and the items she wanted me to make. Custom illustrations of a peach and tassels were the first things I did, and were placed front and center on the digital invitation design sent out to the birthday party guests. Then I got to work on the handmade garland, which was to spell out “She’s a Peach!” and incorporate the colors and font Angie had chosen. I also made sure to work in a highlight of the custom invitation: my peach illustration.

I printed the peach illustration at a couple of different sizes and also cut out each individual peach by hand. Additionally, I used a Silhouette CAMEO to cut the letters out from gold shimmer paper and then I mounted each letter onto two layers of card stock paper sized and arranged to show a slight border when I adhered them together using my favorite tape runner, the Xyron Mega Runner. I then glued two paper circles at the top of each garland piece (for reinforcement where ribbon would be strung through) and punched holes in the center of each circle by hand using a special tool. Satin ribbon matching one of the card stock papers, in a light peach color, was carefully strung through the punched holes and the garland was complete.

At Lucia’s birthday party, the handmade custom garland served as a festive and decorative centerpiece above the dessert table, celebrating the guest of honor and welcoming family and friends to a very joyous and special event!
Filed Under: Creative Projects Pam Winters Studio, Illustration Projects Pam Winters Studio, Uncategorized Tagged With: birthday, custom, decoration, decorations, garland, garlands, handmade, party, peach, project, projects, Special Event, Special Events, tassel, tassels

Custom Garlands: Blissful Bridal Shower

By Pam Winters

Custom Garlands: Blissful Bridal Shower

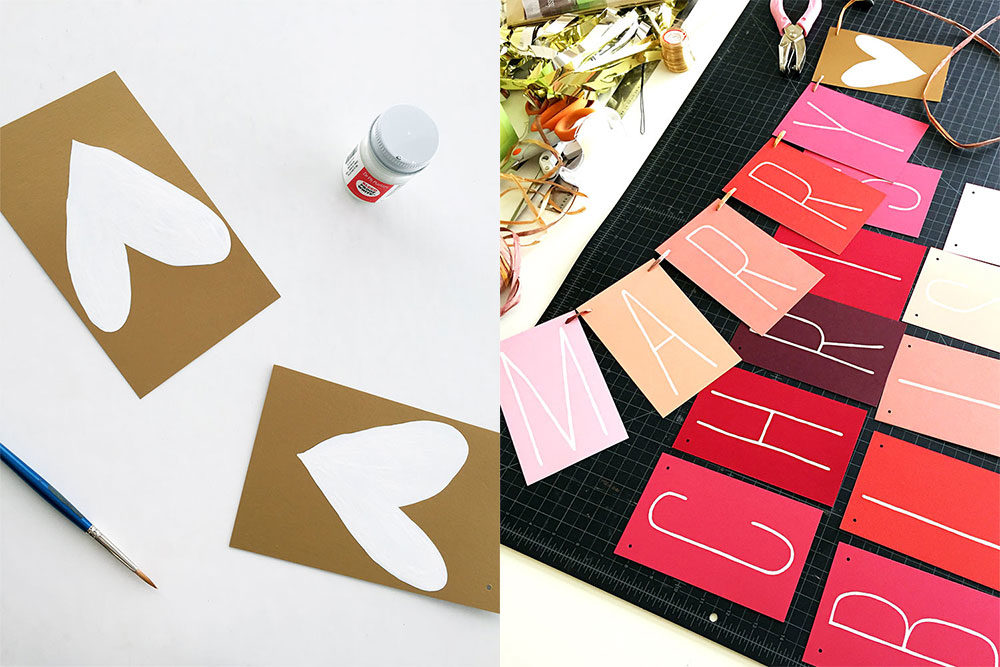
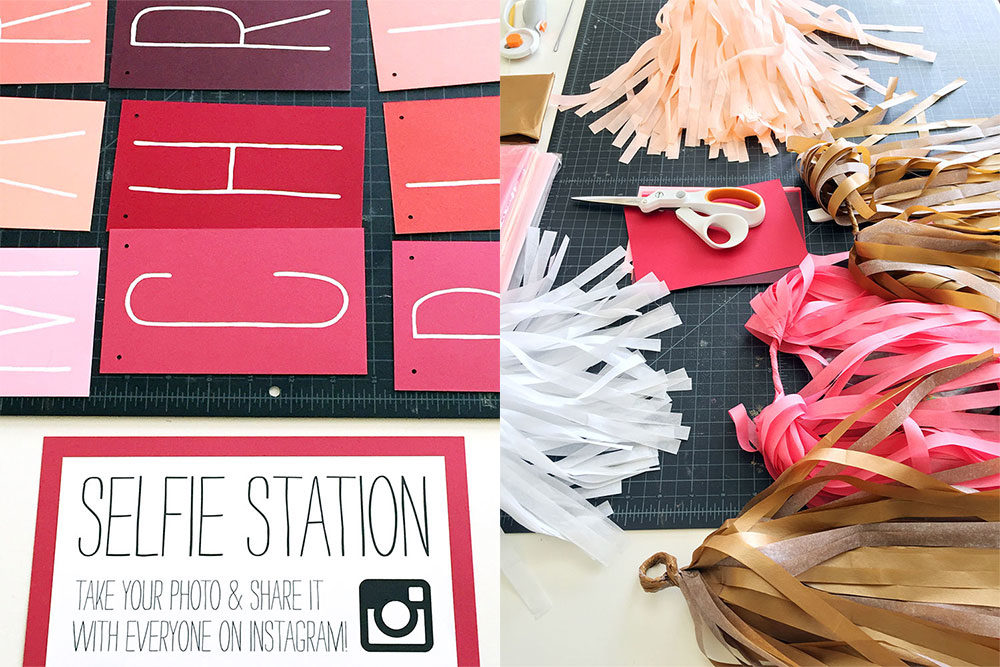
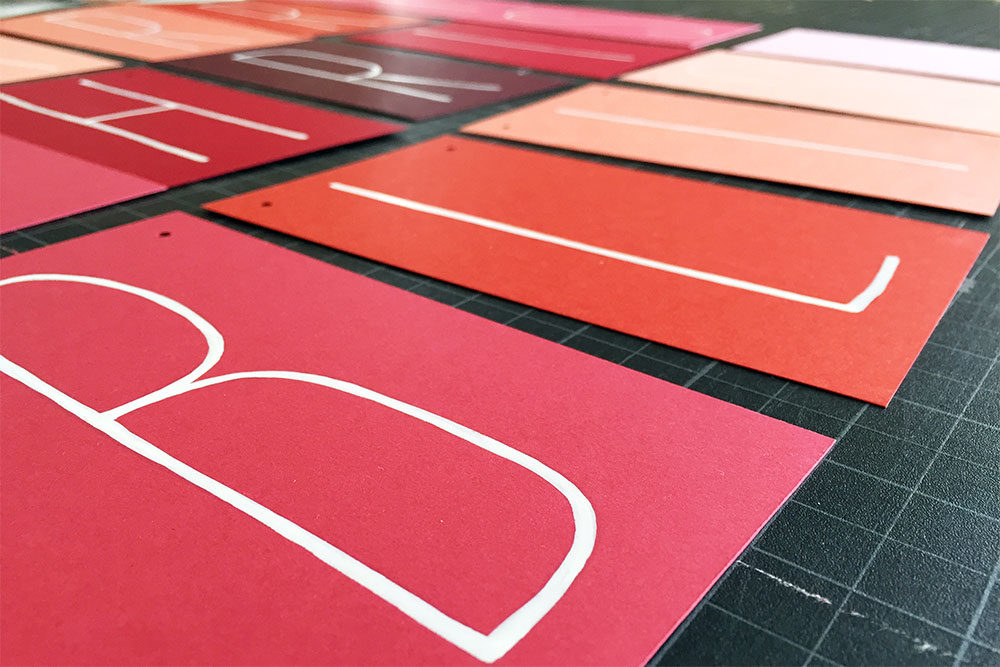
Close-up view of hand-painted letters to be assembled for one of the custom garlands. (All images © 2016 by Pam Winters)

Custom Garlands: Blissful Bridal Shower

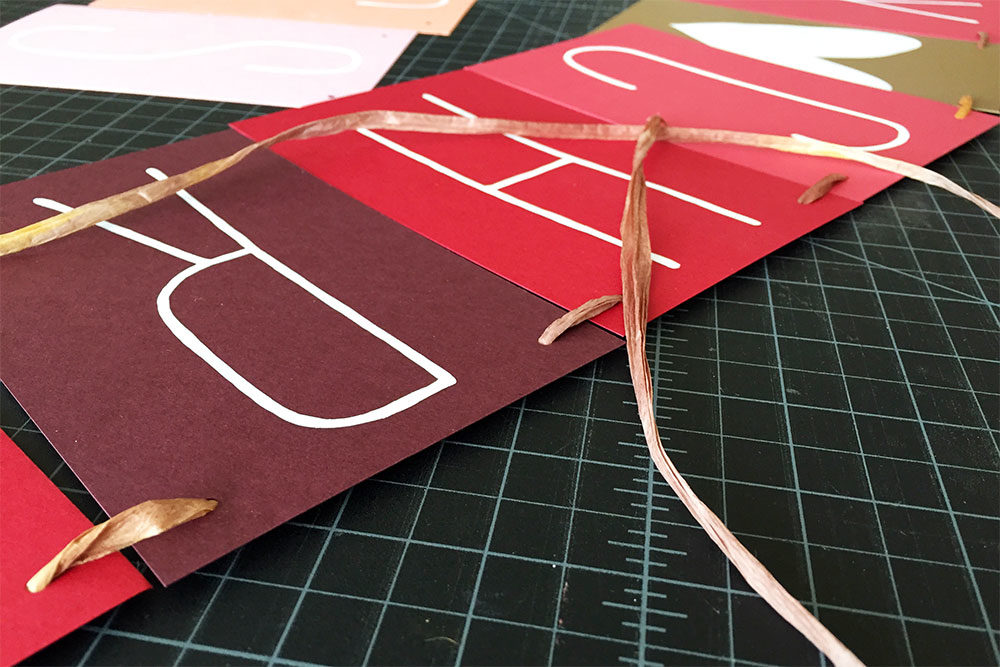
Hand-painted letters were strung together with an ombré raffia of natural tones for this particular garland. (All images © 2016 by Pam Winters)

Custom Garlands: Blissful Bridal Shower

The garland made of hearts and letters was hand-painted on cards matching the bridal shower’s color palette. (All images © 2016 by Pam Winters)

Custom Garlands: Blissful Bridal Shower

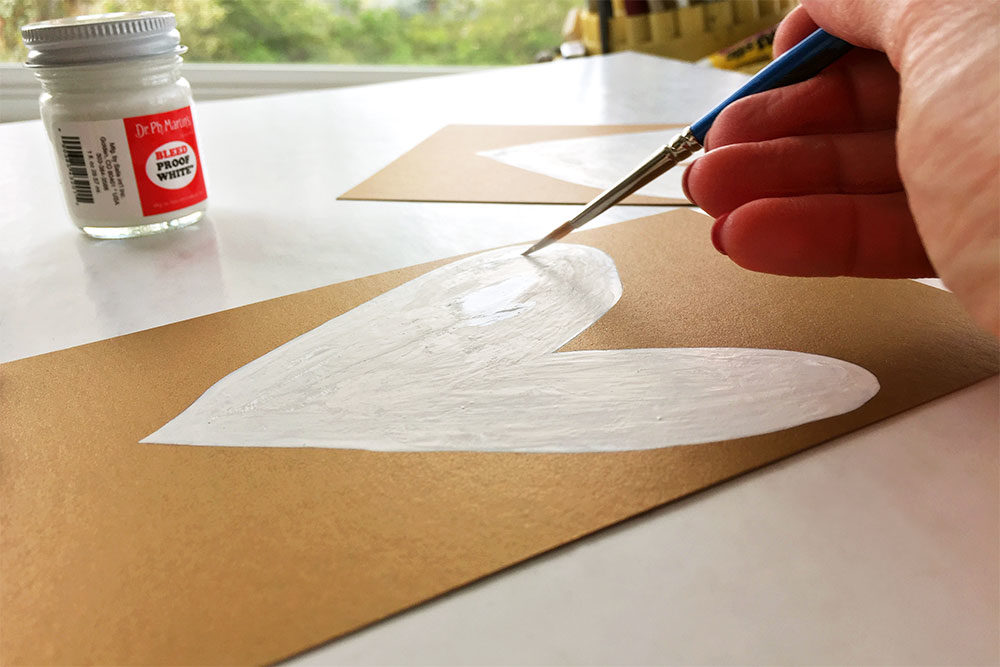
I hand-painted hearts on gold shimmer cards that were strung alongside the garland’s letters. (All images © 2016 by Pam Winters)

Custom Garlands: Blissful Bridal Shower

A second handmade custom garland was created from sheets of tissue paper cut into strips and rolled into tassels. (All images © 2016 by Pam Winters)

Custom Garlands: Blissful Bridal Shower

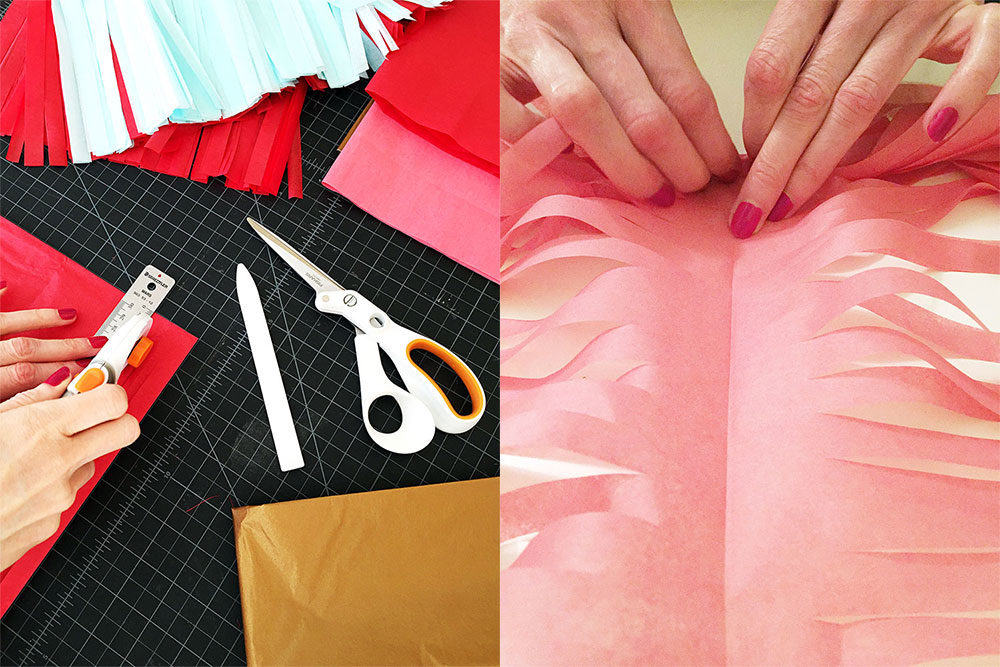
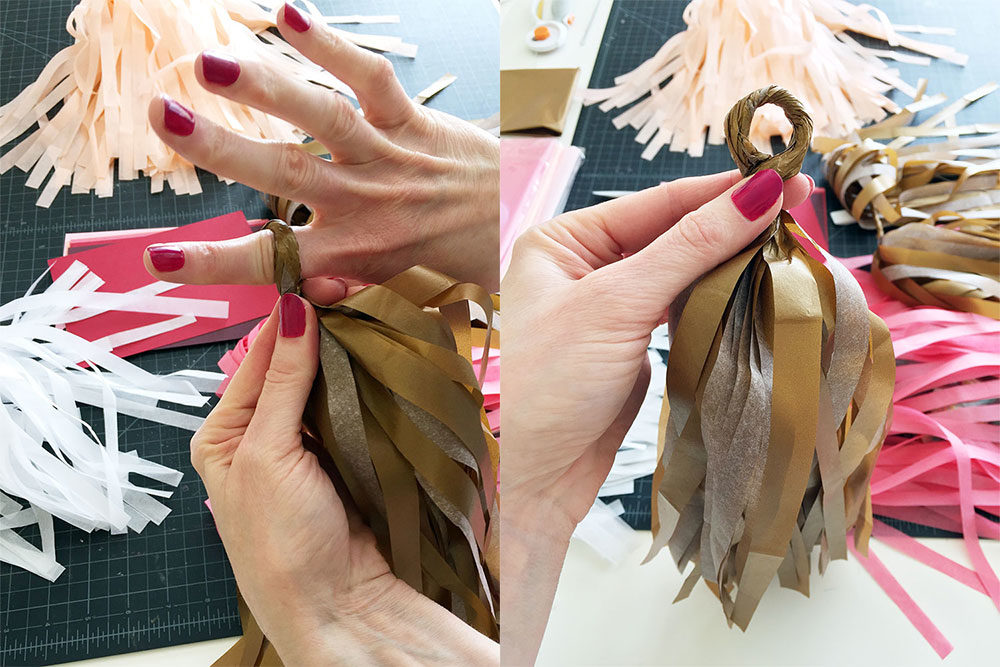
Several sheets of tissue paper were cut into strips and then carefully rolled into tassels. (All images © 2016 by Pam Winters)

Custom Garlands: Blissful Bridal Shower

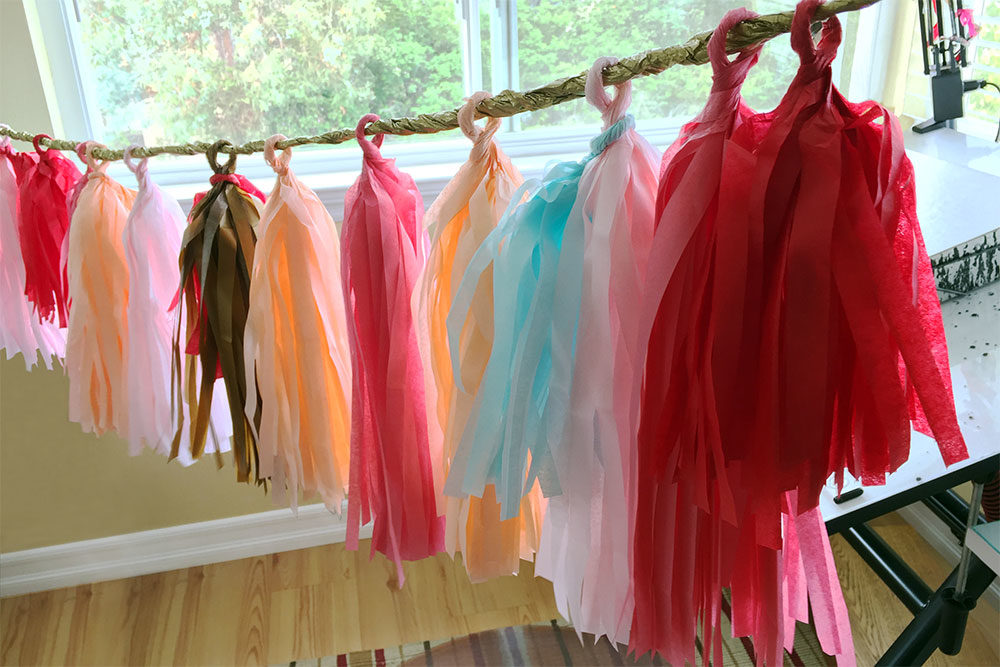
The finished handmade tassel garland reflected the bridal shower’s festive color palette. (All images © 2016 by Pam Winters)

Custom Garlands: Blissful Bridal Shower

All handmade pieces are gathered before assembling each custom garland. (All images © 2016 by Pam Winters)

Custom Garlands: Blissful Bridal Shower

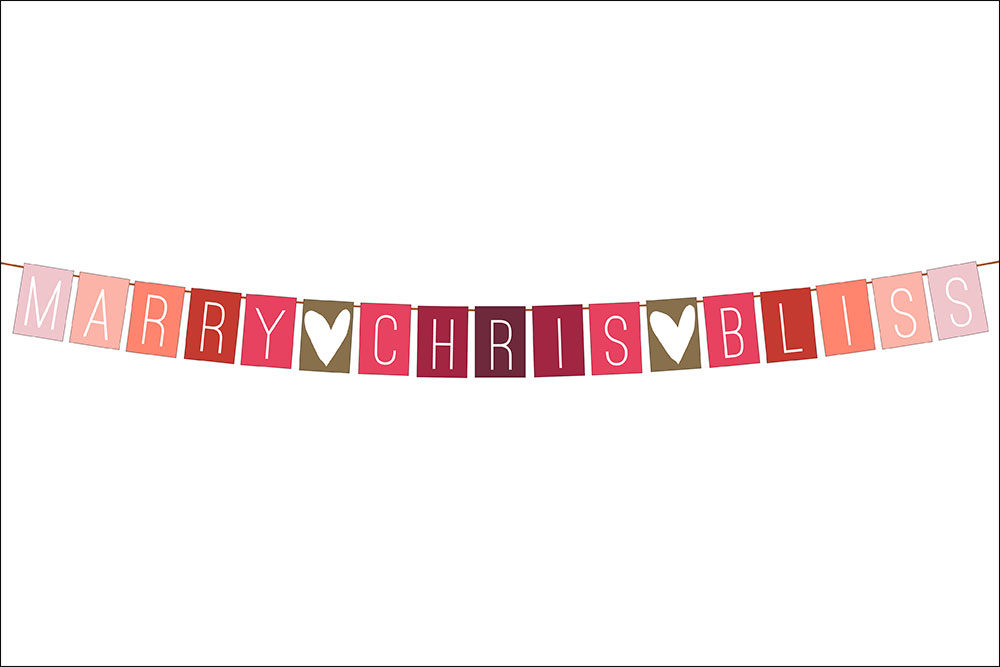
A digital mock-up I created before starting assembly of the hand-painted custom garland. (All images © 2016 by Pam Winters)

Custom Garlands and Signage for a Happy Bride-to-Be

A bridal shower is an occasion for friends and family to celebrate the bride-to-be with a festive party in anticipation of the upcoming wedding day. Decorations also factor in as an important part of the special occasion and that’s where my uniquely fitting design and maker skills come into play. Angie, the future sister-in-law to the bride-to-be, contacted me before the bridal shower she was helping to organize because they needed custom garlands and signage quickly, and she knew she could count on me to deliver high-quality finished products that fit the theme. She sent over the color palette, inspiration boards and invitations being used to guide the event planning for the wedding itself, and we talked over the phone so that she could describe her initial ideas. Once I knew what I needed to produce, I began gathering supplies and organizing everything—both in the way of physical products and digital assets—and went to work creating.

Because there were so many wonderfully vibrant colors being used in the wedding and Angie had expressed a desire to have one of the custom garlands (i.e., the letters garland) made using a gradient effect with several of the colors, my imagination was immediately sparked. With my digital mock-up approved, I collected paper samples and began mixing and matching in order to mirror the mock-up. I found the font being used on the invites, and hand painted each individual letter on the cards in the same style, being careful to paint each letter on the right color of card, so as to create the requested gradient effect from either end of the assembled garland. For the handmade tassel garland, I used several sheets of tissue paper in various hues, a rotary cutter, scissors and steel rulers with cork backing—not to mention quick and steady hands, which did all the folding, cutting, rolling and fluffing of tassels.

All finished pieces were decorative bliss and the tassel garland, along with an Instagram sign I made, were displayed at the shower on a beautiful antique gold organ piano. Angie and the bride-to-be were extremely happy with how well the embellishments helped mark the occasion and accent the evening’s celebration!

Filed Under: Creative Projects Pam Winters Studio, Uncategorized Tagged With: bridal, bridal shower, custom, decoration, decorations, garland, garlands, hand-painted, handmade, heart, hearts, painted, project, signage, Special Event, Special Events, tassel, tassels, tissue paper, wedding

Pineapple Expression

By Pam Winters

Pineapple Expression

Inspired by the tools at hand, I let the project unfold. (All images © 2016 by Pam Winters)

Pineapple Expression

The journey began with a pencil sketch and quickly evolved from there. (All images © 2016 by Pam Winters)

Pineapple Expression

In order to “color in” the pineapple, I created shapes in Illustrator (left) and cut them on a CAMEO using special stamp material (right). (All images © 2016 by Pam Winters)

Pineapple Expression

The stamp pieces made by the CAMEO are mounted onto acrylic blocks, then inked. (All images © 2016 by Pam Winters)

Pineapple Expression

Once the colors are stamped, the pineapple image is inked and stamped on top. (All images © 2016 by Pam Winters)

Pineapple Expression

I started creating lots of gift wrap, cards and prints! (All images © 2016 by Pam Winters)

Pineapple Expression

I then decided to turn the image into digital art using Illustrator. (All images © 2016 by Pam Winters)

Pineapple Expression

Once the digital art was complete, I created a pattern and ordered custom gift wrap from Spoonflower! (All images © 2016 by Pam Winters)

Pineapple Expression

This project required a few tools and lots of patience! (All images © 2016 by Pam Winters)

Pineapples have been dancing through our minds and hearts in recent years. Based on this trend, I had pineapples on the brain when I met with some coworkers for a craft night. Before long, while chatting with my friends, I found myself sketching a pineapple, and then began hand carving a stamp using the supplies I had with me. As we wrapped up for the evening, sharing our projects with one another, I tested out the pineapple stamp on a piece of scrap paper. Not bad, I thought. Someone suggested the possibility of making pineapple gift wrap with the stamp, so I decided then and there that was exactly what I would do! I mean, even at the height of the pineapple’s popularity, it’s not every day you see pineapple gift wrap, right?

I came home that night, and stamped it again using darker ink. I could see my pineapple vision taking shape. Within the next day or two, I got the image carved the way I wanted, and that’s when the process of surface pattern experimentation really began for me. The pineapple looked good stamped on its own, but it needed something—a bit of color to fill it in. I started with colored pencils, making a few cards for friends that way, before gradually expanding my reach to other tools, including the Silhouette CAMEO and special stamp material for the CAMEO to cut. I now had shapes I could stamp first for the color portions of the pineapple, with the pineapple stamp being layered in a darker (chocolate) color on top. This was happening!

There is something unmistakably special about handmade gift wrap, but it’s also quite a challenge. Encouraged to keep going, I decided it was time to take my art to the professionals for the production side of things. So, I digitally traced a scan of the stamped pineapple image in Adobe Illustrator, for the purpose of creating a pattern to upload to Spoonflower’s website. Soon, my first roll of custom gift wrap made with the pineapple pattern arrived in the mail, and it was literally just what I had imagined!

It’s fun to look back and see how this project unfolded, one bit of inspiration at a time. How many things inspire us every day that we could potentially turn into something we only dream of right now? Please take a moment to let me know what’s inspiring YOU these days in the comments section!

Filed Under: Creative Journal Pam Winters Studio, Illustration Projects Pam Winters Studio, Uncategorized Tagged With: blog, design, drawing, Graphic Design, hand carved, handmade, Illustration, journal, pattern, pineapple, Portfolio, project, stamp, surface design

Program: Kaslin & Andrew Wedding

By Pam Winters

Program: Kaslin & Andrew Wedding

Photos of custom wedding program by Stacey Winters Photography (Interior of open program shown here), © 2015 by Pam Winters

Program: Kaslin & Andrew Wedding

Photos of custom wedding program by Stacey Winters Photography (Back of folded program shown here), © 2015 by Pam Winters

Program: Kaslin & Andrew Wedding

Custom wedding program (Digital mock-up of back and front covers shown here), © 2015 by Pam Winters

Filed Under: Uncategorized Tagged With: gift tag, Graphic Design, Portfolio, program, project, wedding, Wedding Graphic Design

  • 1
  • 2
  • Next Page »

Get in touch

Phone: 760-761-4933
Email: pam@pamwinters.com

Office Hours

M-F: 1-5 p.m. (PT)

Stay in the loop

Let’s connect

Back to top
Copyright © 2021 by Pam Winters